Wednesday 21 November 2012

Foil Printing the cheap (er) and cheerful way.

I am amazed at how time has flown by since my last blog. Not sure what happened but hey I'm here now.

You may remember I was having trouble  with my colour  printer.I had a result from HP after I e mailed  them about the ongoing problems. I have a HP Officejet 7500A wide format printer. The main problem was black ink printing, or lack of. Apparently there is a problem with print heads on this model so they sent me another print head and ink. That still didn't solve the problem so they replaced my printer. Took a week to arrive but its great to have a positive outcome. I rarely complain about faulty goods but I did this time and glad I did so.I bought it in May so it was still under warranty.

For quite a while now I have used foil to decorate and highlight text and graphics in my cards. This is how I do it.I think it looks great on  Anniversary and  Wedding cards and this year my Christmas cards are getting the treatment.Well until I get bored...


You need a laser printer   I have a Samsung ML 1860 Series Mono printer which cost about £50.

Toner Foil  ( http://www.patsymay.co.uk  has a good selection I think the 8inch roll is about £10 and smaller one about £6 but if you look around toner foil can be bought by the metre. Just to set you off.)


and a Laminator.( not a special one just a basic laminator this one cost about £14)


Print out your design with your Laser printer, I always turn the image black on my computer before I send it to the  printer but there are good effects to be had by leaving it coloured as well. Experiment.

Depending on the text use the darker setting if you have a choice.
In Properties go to Graphics
Quality -Normal
Font text -Medium
Tonor save-  Printer setting
Darkness - Dark

Heat up the laminator.

Meanwhile lay  the image on a sheet  of thinnish paper. Place the foil over the top make sure the entire  image is covered with foil,  glossy side up and then cover the whole lot  with another sheet of paper and pass through the laminator.


Leave to cool before peeling off the foil.


If its spotty it might be because your laminator isn't hot enough. put it through again.

I think you will agree that these simple designs are just great to add as a topper.


I've added a couple of finished toppers.Hope you like the effect. I'm off to finish off my cards now.
Just for a laugh ...this is my craft room when I'm in the middle of a session.I have been having a play with the panoramic app on my new phone.


Bye for now. Thanks for popping in.Come back soon. xx


Wednesday 17 October 2012

Shrink Plastic Embellishment Mens Birthday Card

Thanks for stopping by

The road to Heaven is paved with good intentions. I think that may be a misquote but still the general meaning is there. I do have good intentions to keep this blog up to date but hey, life shifts at some speed and sometimes runs away with me. I can't believe I haven't blogged for so long.

I have decided to take a bit of a break from work at present. (long story) and I am thinking about making cards in a more serious way and actually getting paid for them. A lot of decisions to make. Any advice gladly received. I know selling cards can be a bit hit and miss and it certainly isn't the easy option but I do enjoy making them and the recipients seem to enjoy receiving them. I don't have to decide just yet so watch this space.

I seem to be having a bit of a Martha Stewart time and I am in the middle of  making chutney today. Does it really need 4 hours? I made apple jelly this morning and  just as I was about to drain off the juice I pictured myself throwing the whole of the waste plus my jelly bag into the rubbish bag last week. Yes! you guessed it the bin had gone. Help. I had a quick trawl around the neighbours but no luck. Didn't fancy using tights. In the end I used one of those lace fruit bowl covers.The jelly seems ok if a little overcooked and the cover seems to have recovered well. The best of it was I was in Hobbycraft the other day looking at Jelly bags and nearly treated myself to one of those with a stand. Mine was just a bag that you threaded 2 wooden spoons through and then rested it over a bowl on 2 rice crispy packets. A slight problem as we don't eat rice crispies but you get the drift. lol


My brothers Birthday a couple of weeks ago. The brief from Mum was to make a card reflecting his hobby of photography.

I decided to do something a bit different and made a Criss Cross card. Luckily I had a picture of my brother holding a camera. The embellishments are from  MCS Men y Happy Returns Graphics programme printed  onto shrink plastic and cut  out. I had great fun 'cooking' them in the oven. I usually use a heat gun but this time found it much easier in the oven.I must say I will do that again as I had forgotten how useful shrink plastic is. I've had it in my stash for ages. A verse on the back and there you go. Mum and Brother both happy.


I have entered this card in  http://cardsformen.blogspot.co.uk/

Saturday 22 September 2012

Hello again. Thanks for popping in. I have had a few busy weeks at work and play. A little bit of crafting but not had much time to publish.I don't know where the time goes.

Today has been sunny but quite cold. I have even put the electric blanket back on the bed and tonight we have lit the log fire.Wimps or what. Its only September.....


 A friend at work asked me to make a card for her daughter. The brief was 30th birthday,Cath Kidson and purple.I did my best by selecting various backgrounds that looked like Cath Kidson possibilites from the Craft Artist digikits and changing the shades to lilac and purple.The topper is from MCS countryside garden.
I think I met the brief and my friend loved it.I also did a box which you can see at the side. I eventually finished that off with some lilac ribbon around the edge of the box.


I also did another just in case she didn't like the first one.The topper is from a selection of digistamps from The clipart fairy.


Monday 13 August 2012

Happy Birthday with Grand Calibur Florals

I am certainly making up for lost time. Ok The 'Lympix' is over. We have a bit of a break before the Para Olympics and I am in the mood for crafting.

Hubby and I have just had a weekend away in Yorkshire. Years ago when we lived in Oxford we used to go Letterboxing in Devon. For the uninitiated this is a mix of orienteering and treasure hunting. Once you find the 'treasure' which is a rubber stamp, you take an impression and leave a copy of your own personalised one. We are known as the  Dawdling Deans so thats what is on our stamp. In 1991 we moved to Bawtry in Yorkshire and discovered that someone had set up a similar thing in Yorkshire.So over the years we have been back and forth and have hundreds of stamps.We occasionally meet up with fellow'boxers' and had our 20th anniversary a couple of years ago.

Anyway to get back to my point. I do go on don't I? Last week found us in Masham. Staying in a lovely pub The Blue Lion.  On Friday we walked up hill and down dale- about 9 miles in total, but it felt much longer we managed to find all but one of the planned stamps and it was a gorgeous sunny day.So after all that exercise  I now feel I qualify for a day crafting. I am not a natural athlete....


Happy Birthday Circle Card

Have entered this card in the  http://allsortschallenge.blogspot.co.uk/
For this card I used images and backgrounds from The ClipArt Fairy
Grand Scalloped Circles
Afew card candy and butterfly and ribbon from my stash


Sunday 12 August 2012

Simple Anniversary Card

I was in the mood for crafting last week. Unfortunately work got in the way a bit and my printer decided to play up.Why does this happen when you are having a bit of inspiration? I quite often use My Craft Studio but again this was playing up and kept freezing, of course Tim took the brunt of it. Computers and printers not working....his fault surely. Eventually everything was in working order but by then I had taken an interest in the days proceedings in the Olympics. Twas the day we won 3 Golds. An amazing day for team GB. Very proud to be British at present. Me thinks the Olympics have turned out well. I am not sporty by nature but can get quite animated from the sofa.

A simple idea I had..

An  easel card  using a 3 layer moveable topper. Starting from the back with a Grand Calibur Scalloped Circle cut out in red then 2 layers of Nestability Beaded Circle  onto which I have printed  images from The Clipart Fairy. A couple of flourishes cut out with my Marianne Designs Creative Flourish Die.The background papers are from a selection again by www.theclipartfairy.com . A brad allows the swivel.


Another day another problem with my printer. This time I was trying to print onto a 6'x12' card. I had first designed the card in Craft Artist Professional and this allows you to design the whole card including insert and back page. However when I tried to print onto the 6'x12' card (eventually ending up with a 6'x6' card) I couldn't customise my printer to do this. Of course my in house technical wizard came on the scene trying to sort it. After an hour of trying to sort it with the printer defaults etc I had again lost interest and I printed onto A4 card and cut off the excess. Apparently my printer doesn't support the custom sizes that I had chosen. Typical! Especially as my previous printer did and does so I expect I will be getting that back out. At this rate I will have a printer on every surface.

Another card quite simple with swinging heart and a couple of added flowers.The images are again from www.theclipartfairy.com

Wednesday 8 August 2012

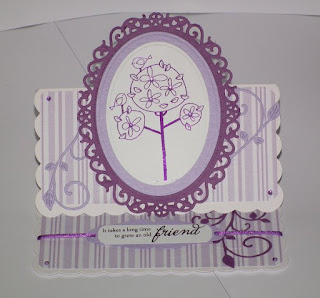
Friendship Tree Recipe Challenge

Hello there.
Thanks for having a look at my blog.
I know I should be outside sorting the garden, after all its not every day that the sun shines however....... last night I decided I would enter a competition. My friend Jools is always trying to encourage me to do so.

This is the card I entered.
The brief was  2 Stamps + 1  Paper + 3 Flowers.
 Lets hope I met the brief.
Hope you like it too.


Allsorts Challenge

I used Pink Petticoat Friendship Digi Stamps. 
 Pro markers. Pink Petticoat backing paper.
 The flowers are cut out from images from MCS.
I also used Floral Ovals Nestabilities and Classic Ric Rac Edgeabilities.


Tuesday 7 August 2012

Another Couple of Friendship Tree cards


6'x 6' Easel
 This time using background papers from www.funkyhand.co.uk  I have had them a while. Floral Oval backgrounds in purple with a couple of oval mats.This time I used the sentiment on the bottom of the easel card. Flourishes add a bit of something. Not sure what but I like them.

Pink with White  Floral Oval

A Trio of Friendship Tree Cards

Thanks for calling in. I have  couple of blogs on the backburner but can't really publish them because they haven't been  sent out to the recipients yet.

I decided to treat myself to a day in my craftroom today. That sounds a bit grand but when my daughter left home we seemed to have a couple of rooms which we didn't use. Now as I have said many times, I am a messy crafter (there I've said it again) and so it seemed rather a good idea to move all my crafty bits in one place. My ever suffering hubby  sorted some shelving out and its all mine..... A space for me at last. I suspect Tim thought it was a good idea as it saves him picking up the sticky bits and clearing the table before he can eat.
So to get back to my story today I was going to spend the day in it.( the afore mentioned  craft room) well give or take a couple of washloads and a couple of meals oh and a visit to my Father in Law who lives in the village. 

Several weeks ago I downloaded some graphics from www.pinkpetticoat.co.uk Very simple black and white trees with simple greetings. Printed them out with my laser printer and foiled some of them.I decided to see what I could do first I coloured them in with either Gel Pens or Pro Markers.


A5 card embossed with Sissix Texturz plate and then mat and layered with Nestability labels 17. A few pearls to add interest and just a sprinkle of Glamour Dust.
This time I edged the card with Spellbinder Edgeabilities Classic Ric Rac. I also used insert A to emboss and cut out near the fold as well.A black and Gold Faux Ribbon through a  couple of the cut outs and a Marianne Design Flourish  and a few black gems to finish.

Nothing different its a pity you can't see the embossing of the plain card. Looks quite good.


Wednesday 1 August 2012

A Trio Of Heart Bride and Bridegroom Cards

Once again I have been away for a couple of weeks. My husband Tim and I have a share of 2 Narrowboats one of which is called Festina Lente.( Make Haste Slowly) She is based in Sandbach, Cheshire and this time we took her around the Cheshire Ring. This is basically as the title suggests a circular route around Cheshire taking in Marple, Ashton,Manchester City Centre and Runcorn amongst other places. Of course just our luck it rained...... a lot. Still we had a good time and as the locks were so difficult and stiff at times I can now safely negotiate a lock on the boat as apposed to working the paddles and gates of the locks as I usually do.We have had Festina for 3 years and I have avoided this treat every time.
I don't take crafts on the boat as I find I have always forgotten something and also I am far too messy.

On our return we had a visit from our German Friends Heidi and Uwe. We have know them for 22 years and although we don't meet often enough, Heidi and I have always had a craft connection. This time was no exception and sharing ideas is always good. Our men just raise their eyebrows and leave us to it. Possibly knowing we will be off to the shops in the near future for kit that has been recommended.Heidi had lots of ideas one of which was a heart shaped bride and groom. I couldn't wait to have a go and below is the result.

Heart Easel

Basically 2 heart shapes.
On the groom (black) one is  a slit 1cm into the centre then folded back to form a collar and stuck on a white heart shape onto which I have formed a 'tie' which is a knotted piece of ribbon. 3 pearl buttons and a silver 'pocket' finish it off.

The bride is formed with a smaller embossed shape on top.


Nestability and Heart Embossed card. The multi layered front opens and includes a greeting. A  Foiled Flourish background to brighten up the B+W.


A5 card with added flourishes and glamour dusted bride bustier.

Sunday 13 May 2012

Christening Rocker and Easel Cards


Hi There

Thanks for popping in.We have been away for the past week on our narrowboat Firefly. I miss being able to make cards when I am away but I don't think Tim my husband would be too impressed.We are meant to be getting away from everything for a while. I get the odd comment about the little square patches from the sticky pads that seem to get everywhere at home, so perhaps the boat is not the place. I did try once but found that I couldn't be as creative when I don't have all my bits and pieces around. Besides which we seem to have enough kit with us as it is.


On the way home we stopped off in Lancashire for my Great Nephews Christening. I had to do 2 cards one for my Mum and another from us. For the easel card I imported the Clipart Fairy Easel shape into Craft Artist  and then changed the colour to blue I also imported a picture of Louis and framed it with CA and faded the image so that it was in the background not easy to see but it does look lovely,Added a verse and cut out the shapes by hand. Mounted the easel in the usual way onto 260gsm card added a ribbon with a button and a few card candy to add interest. The box is made from 260 gsm card which I printed from My Craft Studio Celestial Horizons backgrounds.

For this rocker  card I used another Clipartfairy Baptism Angel Boy image. The backgrounds are from a range on the Craft Artist which I cut out with my newly acquired Grand Calibur Floral Circles. Layered and mounted onto 260gsm card I found this stiff enough not to need help with standing.I held back with the glitter.I love the smokiness of the image on this.

I suppose I had better stop messing about with my blog now. Washing and the usual post holiday stuff to sort out. I also have a couple of cards to finish. Hope you will call again.

Sue x


Friday 4 May 2012

Easel Wedding car Card


Spent most of the day faffing trying to finish a couple of cards for a Christening.The rain in Lincolnshire did help as its far too wet to tend to my rather neglected garden. A bit of sun wouldn't go amiss. I'm sure I'm not the only one thinking that. Was Monday Summer?
Another card to add to my blog although this will be the last one for a week or so. I need to give my friend Joolspapercrafts time to catch up.This is a firm favourite card. I used the papers from another Clipart Fairy download -Interactive Wedding Car.
I printed 2 images of the car- one onto vellum  one on card.Then covered the card one with the vellum one.The top one printed slightly bigger so that I could squash it up a bit then I used red brads through the rear light to fix the vellum  image to the card. I have been known to add the bride and grooms names to the windscreen.


Baby Boy Congratulations Easel Card


This blogging lark is addictive.
I love the clean lines of this card. The image is baby boy frame from www.theclipartfairy.com. I've used a Martha Stewart edge punch and added Glamour Dust to the cap and frame with a few candy buttons to trim. Simples!


Thursday 3 May 2012

Reception Menu - Place cards and a Table Plan

Lastly the table plan

I used an A3 canvas covered in Pink Parchment paper. Trimmed it with butterfly ribbon and printed out the circular tables with the names. Butterflies were then added and Voila  Done!!!!

The menu with place card. I also put the number of the  table on the back of the menu.


Order of Service


The next task was the Order of Service. I decided to do a rather detailed one with a history of the church to make it a bit different. I got quite friendly with the vicar! Over the Internet you understand. First names in the end. ( ooh get me)
Once again the Tattered Floral Butterflies came into play but this time I didn't foil them.Printed directly onto a 5x7 card.  I mat and layered the front detail.  Added a pink parchment insert with all the details starting off with the Order of the Day following with Order of Service and then finishing with the history of the church.


Pocket fold foiled butterfly Wedding Invitations


Last year my niece got married. All the family were very excited as we only have 4 young ones in the family and they were all dragging their feet. Only kidding! but we hadn't had a wedding for a while. I asked the happy couple if I could do their wedding stationary as their wedding gift. They were delighted.

At the time of volunteering the wedding was at least a year away but then they decided to bring it forward and suddenly it was 12 weeks away. The panic was on. My panic that is, the Bride and Groom were as calm as anything.I live a 3 hour drive away so the phone and computer were getting hotter by the minute.The theme was butterflies and colour pink and black. I trawled through my stash and various web sites and   between myself and my niece and maybe a nod now and then from the groom we were away.

I made pocket folders out of 6x6 card by wrapping them with patterned paper to fold round the edge to add a pocket. I used the butterfly background from the My Craft Studio Tattered Florals Range. I had bought a laser printer so that I could foil the wording but then we decided that the background looked good foiled as well. I didn't have special equipment I just used a laminator which worked really well. I also printed, foiled  and cut out butterfly embellishments to stick on the front.I had about 180 to cut out.........
Various inserts were printed off,including a map and directions to the church and venue and details of accommodation (a word of advice don't trust the internet when trying to find phone numbers etc I printed everything off and then realised there were incorrect ) also a RSVP I used a Martha Stewart edge punch for the butterfly edge.
A nestablity wonky square with a butterfly and ribbon added to the front of the invite and hey presto the invites were done. They could now go out and I had a bit of time to do the rest.....to be continued after I have made a nodding aquaintence to my housework.


Golden Wedding 6x6 Stamped embossed card

Another simple card. I promise I do more complex ones now but these are just a few quick ones I did in the past. A bell and dove stamp which I embossed,layered with foil card added a bow and a  tag. Sorted!

Quick Mat & Layer card for Sister


Quite keen to get a few cards on board as I won't be able to post for a week or so.My Mum wanted a card for her sister. Nice and simple with a good verse. I am not good with verses, however managed to fine one that suited. Does anyone else find it difficult to add a verse? Simple Flourishes paper which I've had for ages  from Pink Petticoat. Oval mat and layered with Floral Ovals Nestabilites and finished off with Ribbon and a few Gems.Job done!The font is Curly Mt one of my favourite fonts.

Wednesday 2 May 2012

First Post

Eager to use my new Grand Calibur machine and looking for an  unusual christening card, I came across this Clipart Fairy Baptism Angel Kit download. I used it with the Grand Scalloped circles ( my only set at present) with a little Glamour Dust to finish off the tears.Quite pleased with the result although I need to sort out my camera when I post next time.